はじめに
フロントエンド開発で最近人気があるReactですが、これからReactについて勉強する方向けにMac環境でReactを利用できるようにするための方法をまとめました。
Reactとはどういったものなのかなどについては、下記ブログ等で紹介されているので参考にしてみてください。
初めてのReact「入門編」導入から基本まで〜TODOアプリを作ってを学ぼう!
導入環境
今回導入するMacの環境については下記の通りです
| 対象 | バージョン |
|---|---|
| Mac OS | macOS Big Sur 11.6.1 |
| Homebrew | 3.4.5 |
Homebrewは事前にインストールしておきます。
もしインストール済みでない方は、下記のサイトのインストールコマンドをターミナルで実行してインストールしてください。
/bin/bash -c "$(curl -fsSL https://raw.githubusercontent.com/Homebrew/install/HEAD/install.sh)"
以降はHomebrewがインストール済み後の手順となります。
Node.jsをインストールする
まずは、Homebrewを使って、Node.jsをインストールします。
$ brew install nodejs
$ node -v
v14.4.0
正常にインストールが完了しました。
Node.jsのインストールと同時にnpmもインストールされます。
一応されているかどうかを確認します。
$ npm -v
6.14.5
問題なくインストールが完了していますね。
あとは、以降のプロジェクト作成のために、作業用フォルダを作っておきます。
$ mkdir react_work
$ cd react_work
$ pwd
/Users/usernamexxxx/Development/react_work
これで準備は完了です。
新規プロジェクトを作成する(一括作成)
npxコマンドを利用して一括でプロジェクトを作成する
Create React Appを利用して簡単にReactを導入します。
これを使うことで、難しい設定をしなくてもすぐに使えるようになります。
$ npx create-react-app my-app1
npx: 66個のパッケージを4.2秒でインストールしました。

Creating a new React app in /Users/usernamexxxx/Development/react_work/my-app1.

Installing packages. This might take a couple of minutes.
Installing react, react-dom, and react-scripts with cra-template...


added 1354 packages in 49s

171 packages are looking for funding
  run `npm fund` for details
npm notice
npm notice New minor version of npm available! 8.5.5 -> 8.6.0
npm notice Changelog: https://github.com/npm/cli/releases/tag/v8.6.0
npm notice Run npm install -g npm@8.6.0 to update!
npm notice

Initialized a git repository.

Installing template dependencies using npm...
npm WARN deprecated source-map-resolve@0.6.0: See https://github.com/lydell/source-map-resolve#deprecated

added 39 packages in 6s

171 packages are looking for funding
  run `npm fund` for details
Removing template package using npm...


removed 1 package, and audited 1393 packages in 2s

171 packages are looking for funding
  run `npm fund` for details

6 moderate severity vulnerabilities

To address all issues (including breaking changes), run:
  npm audit fix --force

Run `npm audit` for details.

Created git commit.

Success! Created my-app1 at /Users/usernamexxxx/Development/react_work/my-app1
Inside that directory, you can run several commands:

  npm start
    Starts the development server.

  npm run build
    Bundles the app into static files for production.

  npm test
    Starts the test runner.

  npm run eject
    Removes this tool and copies build dependencies, configuration files
    and scripts into the app directory. If you do this, you can’t go back!

We suggest that you begin by typing:

  cd my-app1
  npm start

Happy hacking!
Reactが利用できる状態となりました。
実際どのようなファイルができたかというと下記のような感じです。
$ ls -la my-app1
total 2200
drwxr-xr-x   12 usernamexxxx  staff      384  4  7 15:10 .git
-rw-r--r--    1 usernamexxxx  staff      310  4  7 15:09 .gitignore
-rw-r--r--    1 usernamexxxx  staff     3359  4  7 15:09 README.md
drwxr-xr-x  793 usernamexxxx  staff    25376  4  7 15:10 node_modules
-rw-r--r--    1 usernamexxxx  staff  1112578  4  7 15:10 package-lock.json
-rw-r--r--    1 usernamexxxx  staff      810  4  7 15:10 package.json
drwxr-xr-x    8 usernamexxxx  staff      256  4  7 15:09 public
drwxr-xr-x   10 usernamexxxx  staff      320  4  7 15:09 src

$ ls -la my-app1/src
total 64
-rw-r--r--   1 usernamexxxx  staff   564  4  7 15:09 App.css
-rw-r--r--   1 usernamexxxx  staff   528  4  7 15:09 App.js
-rw-r--r--   1 usernamexxxx  staff   246  4  7 15:09 App.test.js
-rw-r--r--   1 usernamexxxx  staff   366  4  7 15:09 index.css
-rw-r--r--   1 usernamexxxx  staff   500  4  7 15:09 index.js
-rw-r--r--   1 usernamexxxx  staff  2632  4  7 15:09 logo.svg
-rw-r--r--   1 usernamexxxx  staff   362  4  7 15:09 reportWebVitals.js
-rw-r--r--   1 usernamexxxx  staff   241  4  7 15:09 setupTests.js

$ ls -la my-app1/public
total 72
-rw-r--r--   1 usernamexxxx  staff  3870  4  7 15:09 favicon.ico
-rw-r--r--   1 usernamexxxx  staff  1721  4  7 15:09 index.html
-rw-r--r--   1 usernamexxxx  staff  5347  4  7 15:09 logo192.png
-rw-r--r--   1 usernamexxxx  staff  9664  4  7 15:09 logo512.png
-rw-r--r--   1 usernamexxxx  staff   492  4  7 15:09 manifest.json
-rw-r--r--   1 usernamexxxx  staff    67  4  7 15:09 robots.txt
実行
では早速、実行してみます。
$ cd my-app1
$ npm start
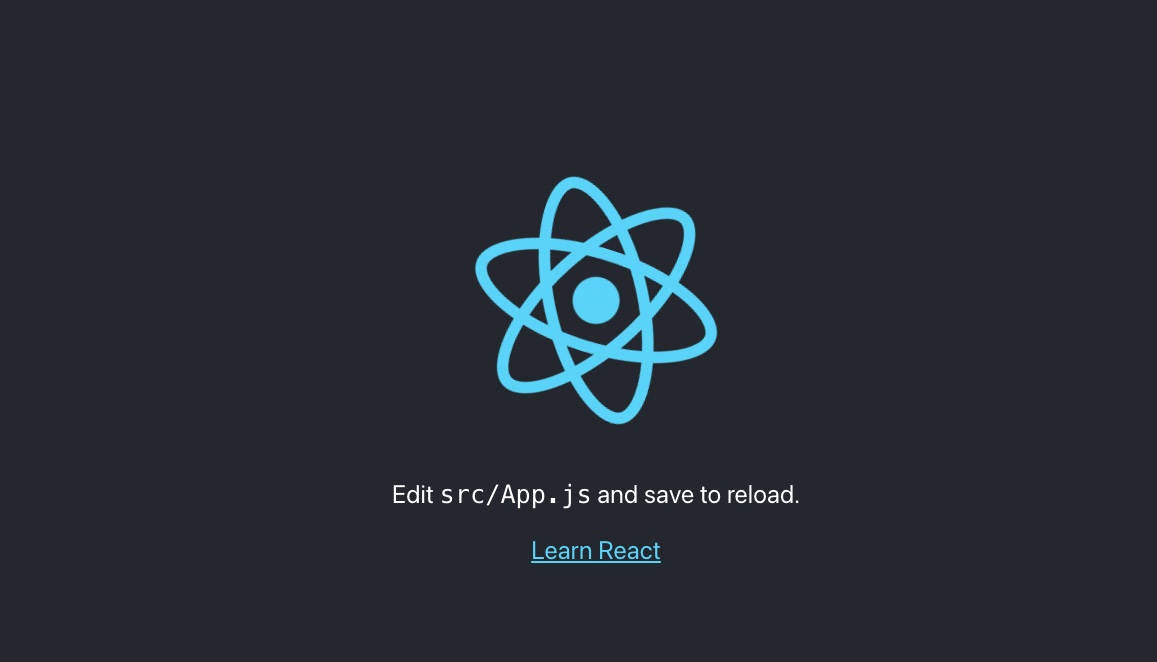
上記を実行すると、下記のような画面が表示されるかと思います。表示されればインストール完了となります。
あとは srcディレクトリのApp.jsを変更するとすぐ反映されるようになります。

新規プロジェクトを作成する(一つずつ作成)
先ほどは、npxで一括で作成しましたが、今回はnpmを使って必要なパッケージを一つずつインストールし、設定ファイルやhtmlファイル、jsファイルを自身で用意する方法となります。
package.jsonの編集
Reactをインストールするためのプロジェクトを作成します。ここでは、react_workディレクトリにmy-app2を作成しています。
作成後はnpmにて初期設定を行います。
$ mkdir my-app2
$ cd my-app2
$ npm init -y
Wrote to /Users/usernamexxxx/Development/react_work/my-app2 package.json:

{
  "name": "react_work",
  "version": "1.0.0",
  "description": "",
  "main": "index.js",
  "scripts": {
    "test": "echo \"Error: no test specified\" && exit 1"
  },
  "keywords": [],
  "author": "",
  "license": "ISC"
}

$ ls
package.json
package.jsonファイルが作成されました。
このpackage.jsonファイルをVSCodeなどのエディタを使って開き、以下のように修正します。
{
  "name": "my-app2",
  "version": "1.0.0",
  "description": "React working package",
  "main": "index.js",
    "private": true,
  "scripts": {
    "start": "webpack-dev-server",
    "webpack": "webpack -d"
  },
  "keywords": [],
  "author": "",
  "license": "ISC"
}
privateキーをtrueに設定します。
理由はプロジェクトを誤って公開しないようにするためです。
scriptキーに対して、「start」として「webpack-dev-server」を指定し、「webpack」として「webpack -d」を指定します。
webpack-dev-serverはwebpackを使用したフロントエンド開発時に利用できる開発環境向けのwebサーバーです。
webpackとは、Webコンテンツを構成するファイルを「モジュール」という単位で取り扱ってくれるようにするためのツールとなります。
npmパッケージインストール
package.jsonを作成後は、reactやwebpack、webpack-dev-serverなど必要なパッケージをインストールしていきます。
$ npm install react react-dom
npm notice created a lockfile as package-lock.json. You should commit this file.
+ react-dom@18.0.0
+ react@18.0.0
added 5 packages from 2 contributors and audited 5 packages in 0.606s
found 0 vulnerabilities

$ npm install -D webpack webpack-cli webpack-dev-server html-webpack-plugin
npm WARN eslint-webpack-plugin@3.1.1 requires a peer of eslint@^7.0.0 || ^8.0.0 but none is installed. You must install peer dependencies yourself.

+ webpack@5.71.0
+ webpack-dev-server@4.8.1
+ webpack-cli@4.9.2
+ html-webpack-plugin@5.5.0
added 287 packages from 248 contributors and audited 518 packages in 10.439s

52 packages are looking for funding
  run `npm fund` for details

found 0 vulnerabilities

$ npm install -D @babel/core @babel/runtime @babel/plugin-transform-runtime @babel/preset-env babel-loader
+ @babel/core@7.17.9
+ @babel/preset-env@7.16.11
+ @babel/plugin-transform-runtime@7.17.0
+ @babel/runtime@7.17.9
+ babel-loader@8.2.4
added 118 packages from 19 contributors, removed 2 packages, updated 1 package, moved 2 packages and audited 583 packages in 5.538s

80 packages are looking for funding
  run `npm fund` for details

found 0 vulnerabilities

$ npm install -D @babel/preset-react
npm WARN eslint-webpack-plugin@3.1.1 requires a peer of eslint@^7.0.0 || ^8.0.0 but none is installed. You must install peer dependencies yourself.

+ @babel/preset-react@7.16.7
added 6 packages from 1 contributor and audited 488 packages in 1.949s

42 packages are looking for funding
  run `npm fund` for details

found 0 vulnerabilities
一部WARNが出ていますが、問題なしです。
今回インストールしたパッケージは下記となります。
- react
- react-dom
- webpack
- webpack-cli
- webpack-dev-server
- html-webpack-plugin
- @babel/core
- @babel/runtime
- @babel/plugin-transform-runtime
- @babel/preset-env
- babel-loader
それぞれのパッケージについての説明は省きます。(一応補足としてどこかで書こうとは思っていますが、まずはおまじないと思ってください)
webpack.config.jsファイルの用意
以下の設定ファイルをmy-app2ディレクトリ直下に作成します。
webpack.config.js
const path = require("path");
const HtmlWebpackPlugin = require("html-webpack-plugin");

module.exports = {
  entry: {
    app: "./src/index.js"
  },
  output: {
    path: path.resolve(__dirname, "dist"),
    filename: "[name].js"
  },
  resolve: {
    modules: [path.resolve(__dirname, "node_modules")],
    extensions: [".js", ".jsx"],
  },
  devServer: {
    static: {
      directory: path.join(__dirname, "dist"),
    },
  },
  devtool: "eval-source-map",
  mode: 'development',
  module: {
    rules: [
      {
        test: /\.js$/,
        use:[
          {
            loader: 'babel-loader',
            options: {
              presets: ["@babel/preset-env", "@babel/preset-react"],
            },
          }
        ]
      }
    ]
  },
  plugins: [
    new HtmlWebpackPlugin({
      template: path.resolve(__dirname, "src/index.html"),
    }),
  ],
};
実際に作ってみる
Reactアプリを作るために必要なパッケージの準備が整ったら、次は実際にコードを書いてみたいと思います。
その前に、準備を行います。
ソースを格納するフォルダをmy-app2ディレクトリに作成します。
$ mkdir src
次に Reactを実際に動かすjsファイルと表示用のhtmlファイルを作成します。作成したファイルは先ほど作成したsrcディレクトリに保存します。
index.html
React App
index.js
import React from 'react';
import ReactDOM from 'react-dom';
const App = () => {
return Hello World!
;
};
ReactDOM.render(作成が完了したら下記コマンドを実行してブラウザでアクセスしてみます。
$ npm start
または
$ npx webpack serve --config webpack.config.js
実行すると「webpack 5.71.0 compiled successfully」となれば、成功です。
ブラウザを開き、「http://localhost:8080/」にアクセスします。「Hello World!」表示されれば正常に動作しています。

最後に
Reactは今流行りの言語ですが、実際に触ってみるための準備が結構面倒だったりします。
今回は、一括で全部やってくれる方法と、一つ一つインストールして整えていく方法をまとめました。
まずは前者の方で簡単に触れる環境を整えてみて、その後いろいろ細かいところを学習していくことをおすすめします。


